This step-by-step guide shows how to install Staive, a Jira Cloud app, directly from the Atlassian Marketplace — with no configuration, no data migration, and instant sprint-level insights.
Steps for Installation
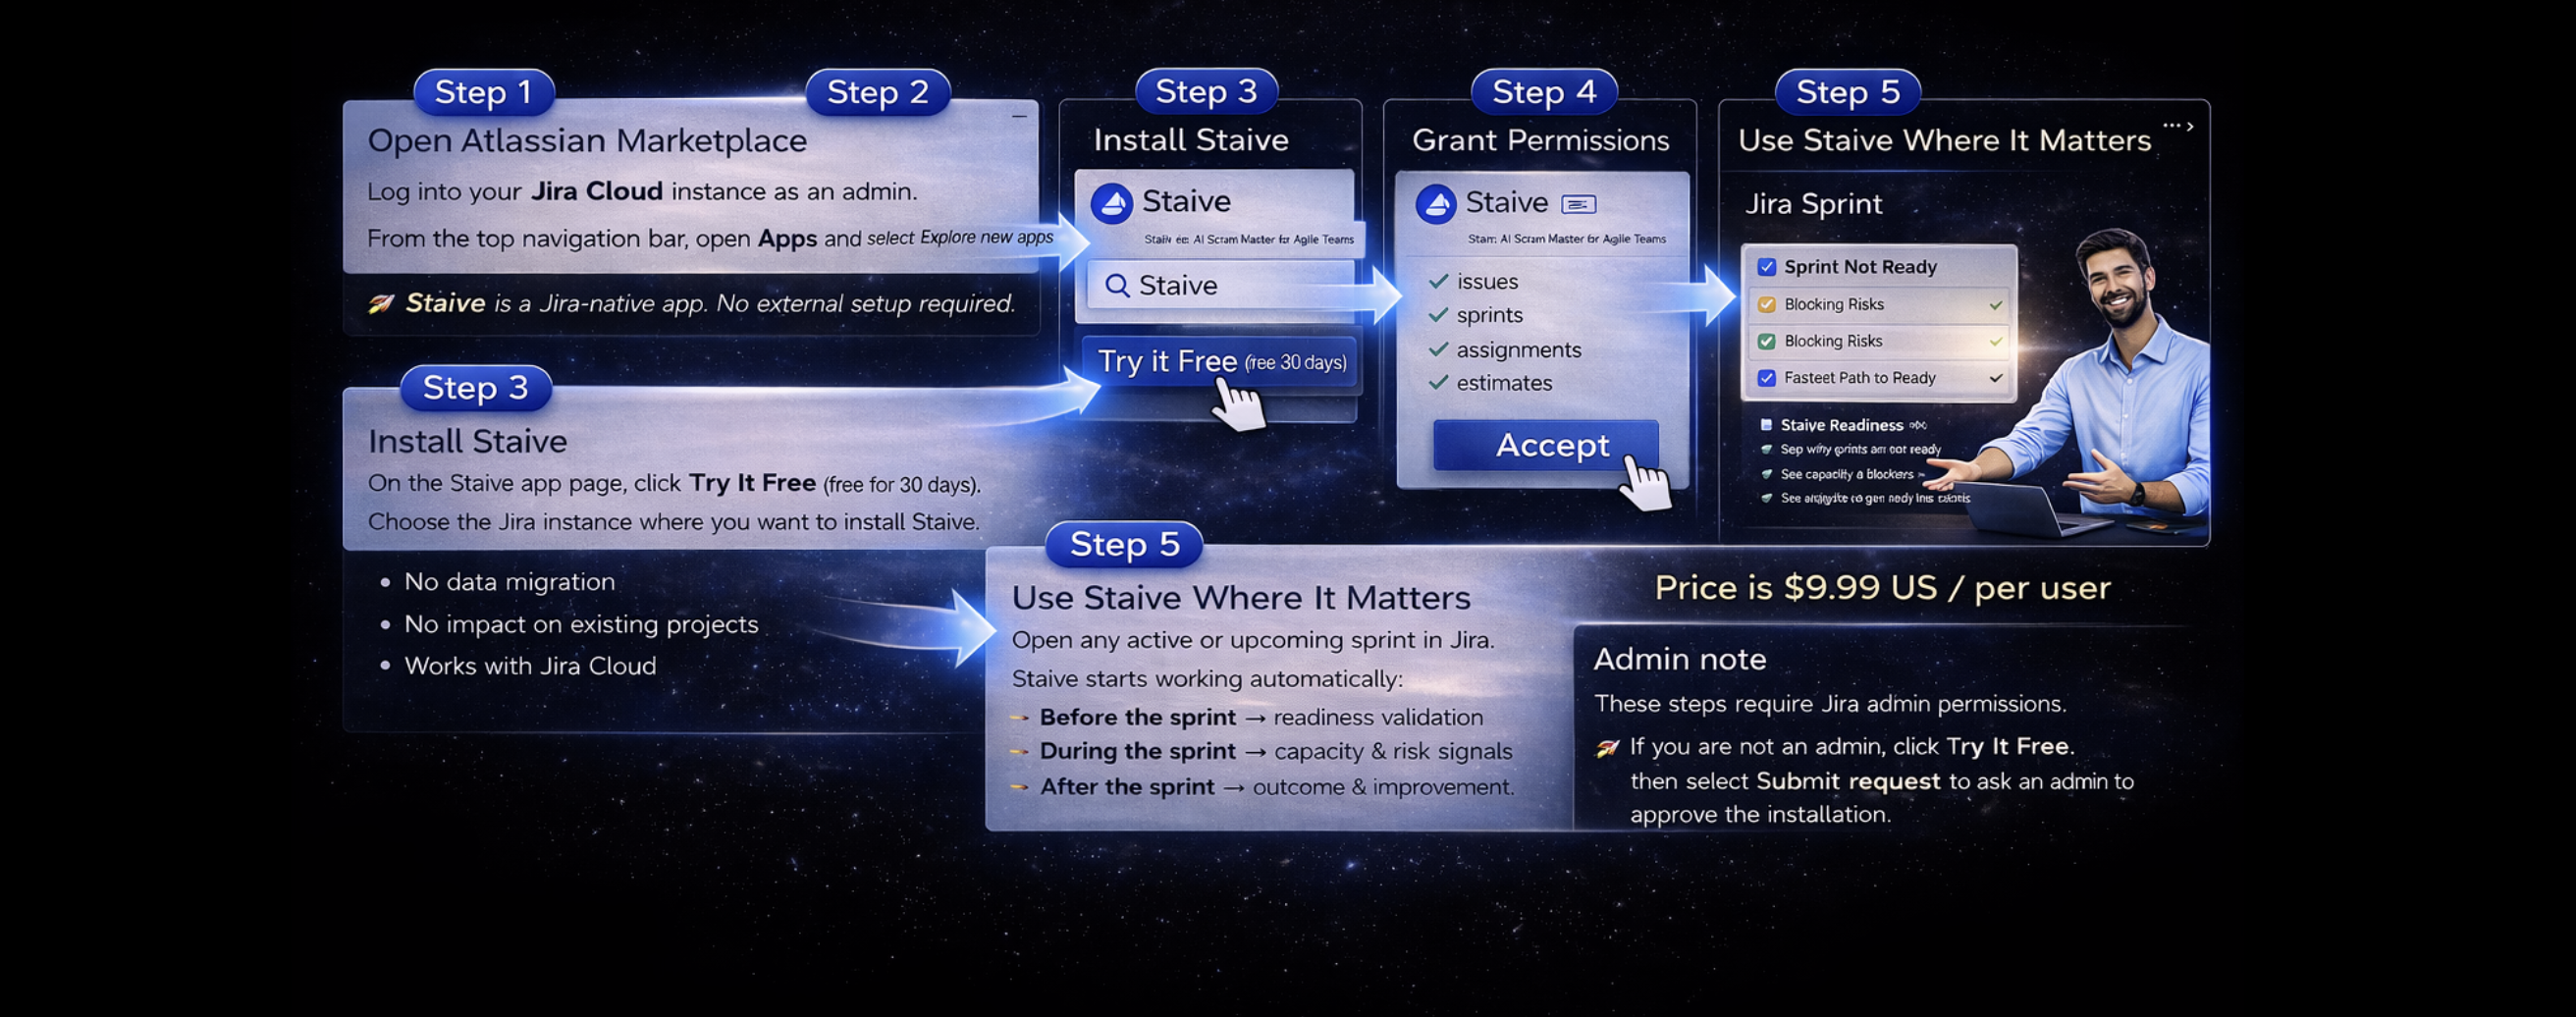
- Log in to your instance of Jira as an admin.
- Select the Apps dropdown menu from the top navigation bar, and choose Explore new apps.
- Once the screen loads, you can type Staive – Sprint Intelligence for Jira in the search bar to find the appropriate app.
- Select the app tile, and the app details page of the specific app loads.
- You can select Try it Free to install the app.
- Once the app is installed, you will be notified via a success message. Following this, you can start using the app.
👉 Staive is a Jira-native AI app. No external setup required.
✔ No data migration
✔ No impact on existing projects
✔ Works with Jira Cloud
Permissions
Jira will ask you to grant standard permissions so Staive can read sprint data:
- issues
- sprints
- assignments
- estimates
👉 Staive never modifies your data.
👉 It analyzes and highlights signals only.
Use Staive Where It Matters
Open any active or upcoming sprint in Jira.
Staive works automatically in Jira with no configuration or manual setup.
Staive starts working automatically:
- Before the sprint → AI readiness validation
- During the sprint → capacity & risk intelligence
- After the sprint → outcome & improvement insights
👉 No setup. No configuration. Value from the very first sprint.
Admin note
These steps require Jira admin permissions.
👉 If you are not an admin, click Try it Free 30 days, then select Submit request to ask an admin to approve the installation.
What happens after installing Staive?
Learn how to install a Jira app from the Atlassian Marketplace.
Follow step-by-step instructions to install Staive, a Jira Cloud app that works instantly with no setup.
